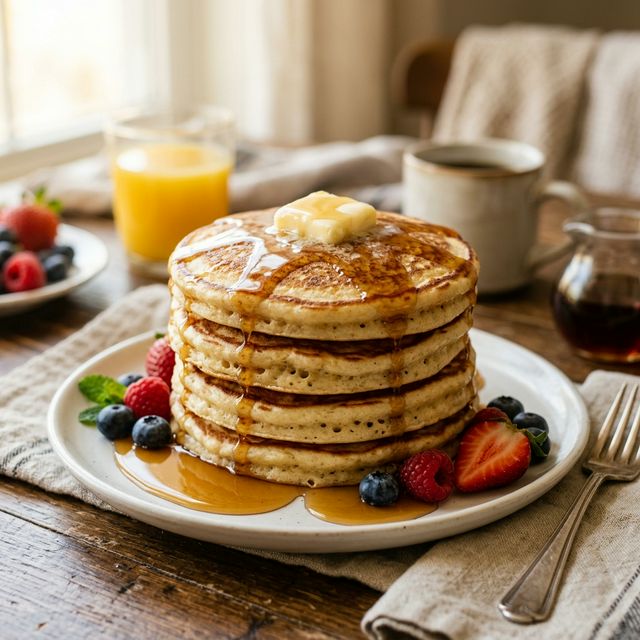
Classic Buttermilk Pancakes
Tender, golden buttermilk pancakes with a crisp edge and open crumb. Undermix the batter, rest it 5 minutes, and cook on medium heat.
Buttermilk pancakes are one of those recipes where the gap between a mediocre stack and a genuinely good one comes down almost entirely to restraint. The batter needs to be undermixed — lumps and all — and it needs five minutes to rest so the baking soda can react with the buttermilk acid and the gluten can relax. That's what produces the open, tender crumb you're after. The double leavening (both baking powder and baking soda) gives lift without making them bready or dense, and the buttermilk adds a clean, mild tang that cuts through the richness of the butter.
These are weekend-breakfast pancakes — the kind that justify getting out a griddle. They're not meal-prep friendly; pancakes are best eaten the minute they come off the heat. Expect a crisp, lightly golden edge, a fluffy interior, and enough structure to hold up under a proper pour of maple syrup. If your pancakes are spreading too thin, your batter is too warm — chill it for a few minutes and your next batch will hold its shape better.
Ingredients
- ▸ 2 cups all-purpose flour
- ▸ 2 tbsp sugar
- ▸ 2 tsp baking powder
- ▸ 1 tsp baking soda
- ▸ 1/2 tsp salt
- ▸ 2 cups buttermilk
- ▸ 2 large eggs
- ▸ 3 tbsp unsalted butter, melted
- ▸ 1 tsp vanilla extract
- ▸ Butter and maple syrup for serving
🛒 Links may earn us a small commission at no cost to you.
Recommended Gear
🛒 We may earn a small commission at no extra cost to you. We only recommend gear we'd use ourselves.
Instructions
Mix the Batter
- 1. In a large bowl, whisk together flour, sugar, baking powder, baking soda, and salt.
- 2. In a separate bowl, whisk buttermilk, eggs, melted butter, and vanilla until combined.
- 3. Pour the wet ingredients into the dry ingredients. Stir gently with a spatula until just combined — lumps are perfectly fine. Do not overmix.
- 4. Let the batter rest for 5 minutes. You'll see bubbles form on the surface.
Cook the Pancakes
- 1. Heat a non-stick griddle or large skillet over medium heat. Lightly butter the surface.
- 2. Pour 1/3 cup batter per pancake. Cook until bubbles form on the surface and the edges look set, about 2-3 minutes.
- 3. Flip gently and cook for another 1-2 minutes until golden brown on both sides.
Serve
- 1. Stack pancakes on warm plates. Top with a pat of butter and real maple syrup. Serve immediately.
Cook's Notes
- Lumps in the batter are intentional — stirring until smooth overdevelops the gluten and produces tough, dense pancakes. Stop mixing the moment no dry streaks remain.
- The 5-minute batter rest isn't optional. You'll see the surface start to bubble and puff slightly; that's the baking soda reacting with the buttermilk acid, and it's what gives the pancakes their lift.
- Use 1/3 cup of batter per pancake for consistent sizing and even cooking. A ladle or liquid measuring cup makes this easier than eyeballing.
- Butter the pan between every batch, not just the first. The milk solids in the butter will burn by the second or third batch if you're not refreshing it — use a paper towel to spread a thin, even coat.
Pro Tips
- → If your first pancake looks pale or spreads too much, your pan isn't hot enough. Treat the first one as a test — adjust the heat, wait 60 seconds, then continue. This is normal and not a sign anything's wrong.
- → Don't press down on the pancake after you flip it. That's how you push out the air pockets you just spent five minutes building. Leave it alone for the full 1-2 minutes on the second side.
- → If the edges are browning before bubbles form on the surface, your pan is too hot. Pull it off heat for 30 seconds, reduce to medium-low, and give the pan a moment to stabilize before pouring the next pancake.
- → Cold eggs or cold buttermilk straight from the fridge can cause the melted butter to seize into small clumps when combined. Let the dairy come to room temperature for 15 minutes, or warm the buttermilk briefly in the microwave (15-20 seconds only).
- → For pancakes with extra-crisp edges, use a thin film of neutral oil (canola or grapeseed) instead of butter in the pan — butter burns faster. Add a small pat of butter on top of each pancake right after it's plated; you get the flavor without the burnt milk solids.
- → If you're scaling to serve 8+ people, resist the urge to make one giant batch of batter. Mix two separate batches instead — a large volume of batter compresses the bottom layers and you lose the airy texture from the rest period.
What to Serve With This
The obvious move is real maple syrup — Grade A Dark (formerly Grade B) has more molasses depth than the lighter grades and stands up better against the buttermilk tang. Avoid pancake syrup made from corn syrup; it's cloying in a way that flattens the whole plate. A pat of good salted butter melting into the stack is non-negotiable.
For protein alongside, thick-cut bacon (Wright Brand or Nueske's) is the standard call. The salt and smoke offset the sweetness without competing. Breakfast sausage links work the same way. If you want something lighter, two fried eggs cooked in the same buttered skillet round out the meal without adding prep time.
For drinks, fresh-squeezed orange juice is the classic for a reason — the acidity wakes up the palate between bites. Strong drip coffee or a flat white balances the sweetness of the syrup. If you're serving these at a brunch with adults, a mimosa (dry sparkling wine, not sweet prosecco) or a Bloody Mary works well; both are acidic enough to keep the meal from feeling heavy.
Fresh fruit on the side — sliced strawberries, blueberries, or banana — adds color and brightness without any extra cooking. Avoid canned fruit; the syrup makes the plate too sweet.
Variations & Substitutions
To make these dairy-free, swap the buttermilk with 2 cups of oat milk or full-fat coconut milk mixed with 2 tablespoons of apple cider vinegar. Let it sit for five minutes before using — it won't curdle the way dairy does, but it will thicken slightly and add the necessary acid for the baking soda to work. Replace the butter with melted refined coconut oil at the same quantity.
For a gluten-free version, use a 1:1 gluten-free flour blend like Bob's Red Mill 1-to-1 or King Arthur Measure for Measure at the same weight. The batter will be slightly thicker; thin it with a tablespoon or two of buttermilk if needed. Don't skip the rest period — gluten-free batters benefit from it even more than standard ones.
For flavor variants: fold in 1/2 cup fresh blueberries or thin-sliced banana after mixing. Add 1 teaspoon of cinnamon and 1/4 teaspoon of nutmeg to the dry ingredients for a fall version. For lemon-ricotta pancakes, replace 1/2 cup of buttermilk with whole-milk ricotta and add the zest of one lemon.
Scaling up: this recipe doubles cleanly. Use a full sheet tray in a 200°F oven to hold finished pancakes while you work through the batter — stack them directly on the rack, not a plate, so steam doesn't make the bottoms soggy.
Frequently Asked Questions
Can I make the batter the night before? ▼
You can mix the dry and wet ingredients separately and store them covered in the fridge overnight. Combine them in the morning and let the batter rest 5 minutes before cooking. Don't mix the full batter ahead — the leaveners will exhaust their reaction overnight and your pancakes will be flat.
How do I store leftover pancakes? ▼
Stack cooled pancakes with a piece of parchment between each one, then seal in a zip-lock bag or airtight container. They keep in the fridge for up to 3 days. The texture softens, but they reheat well.
What's the best way to reheat pancakes? ▼
A toaster on medium setting is the fastest method and restores some crispness to the edges. A 325°F oven for 8-10 minutes works for a larger batch. Avoid the microwave — it steams them and makes the texture gummy.
Can I freeze pancakes? ▼
Yes. Freeze them in a single layer on a baking sheet until solid, then transfer to a freezer bag. They keep for up to 2 months. Reheat straight from frozen in the toaster or a 350°F oven — no need to thaw.
I don't have buttermilk. What can I substitute? ▼
Add 2 tablespoons of white vinegar or lemon juice to 2 cups of whole milk. Stir and let it sit for 5 minutes — it will curdle slightly. This works well but the tang is slightly less complex than real buttermilk. Low-fat milk produces a thinner batter; use whole milk.
Why are my pancakes gummy in the middle? ▼
Heat is too high. Crank the burner up and the outside sets before the inside cooks through. Drop to medium-low and give them a full 2-3 minutes on the first side. The bubbles on the surface should be mostly open before you flip.
Can I use salted butter instead of unsalted? ▼
Yes, but reduce the added salt to 1/4 teaspoon to compensate. The difference is minor in a recipe this size, but it's worth adjusting if you're salt-sensitive.
How do I keep pancakes warm while I finish the batch? ▼
Place a wire rack on a baking sheet and set it in a 200°F oven. Lay pancakes directly on the rack in a single layer — stacking them traps steam and softens the edges. They'll hold for up to 20 minutes.
Do I need a non-stick pan or will cast iron work? ▼
Cast iron works well but requires more attention to preheating — it needs at least 5 minutes over medium-low to heat evenly, or you'll get hot spots. Non-stick is more forgiving. Whatever you use, butter the surface lightly between batches.
Why are my pancakes spreading flat instead of holding their shape? ▼
Either the batter is too thin, the pan isn't hot enough, or the butter was too warm when you added it and partially cooked the eggs. Make sure melted butter is cooled slightly before mixing. If the batter is genuinely too thin, add a tablespoon of flour and rest it another 2 minutes.
Enjoyed this recipe?
Daily Home Cookery is self-funded. If something you cooked here made dinner a little better, a coffee keeps the kitchen running.
☕ Buy me a coffeeYou Might Also Like
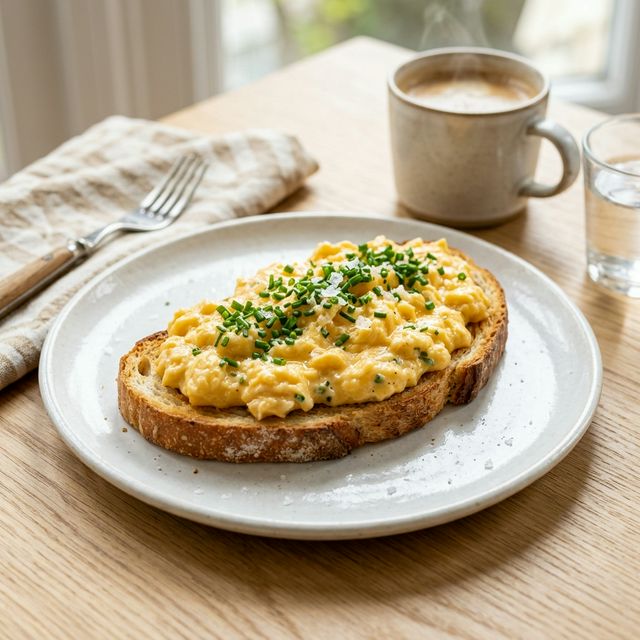
Fluffy Scrambled Eggs with Chives
Low-heat scrambled eggs made with butter, heavy cream, and fresh chives. Technique-driven recipe for soft, glossy curds every time.
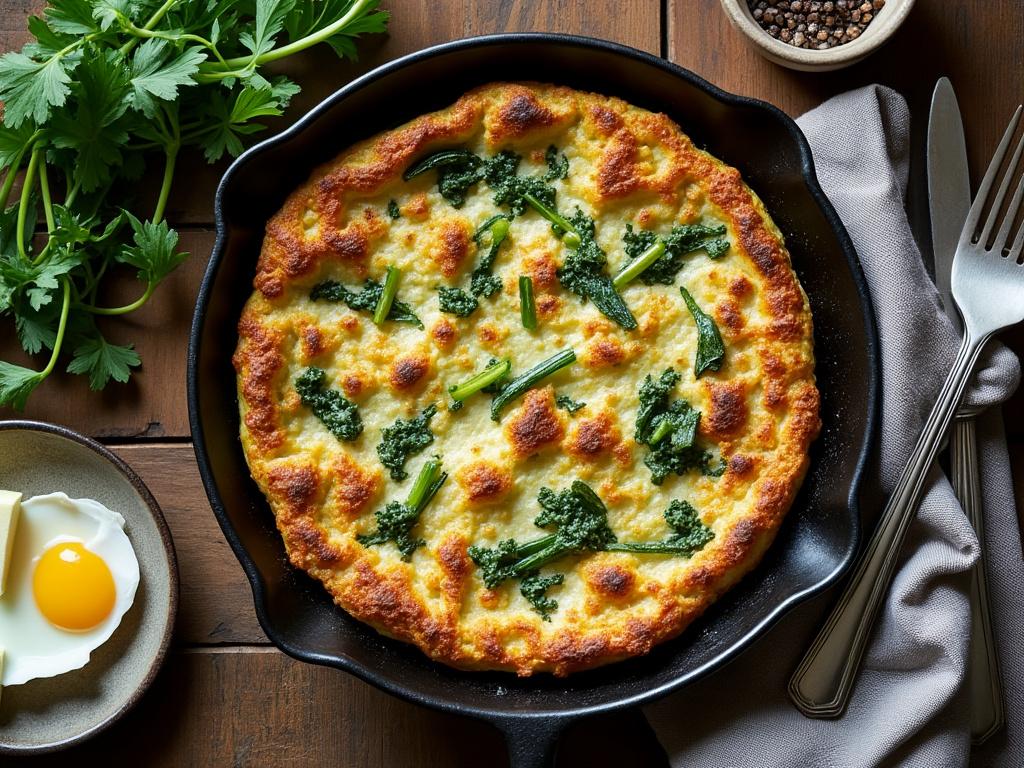
Caramelized Leek and Goat Cheese Frittata
A golden, custardy frittata with deeply sweet caramelized leeks and tangy goat cheese. Ready in 45 minutes — perfect for brunch or meal prep.
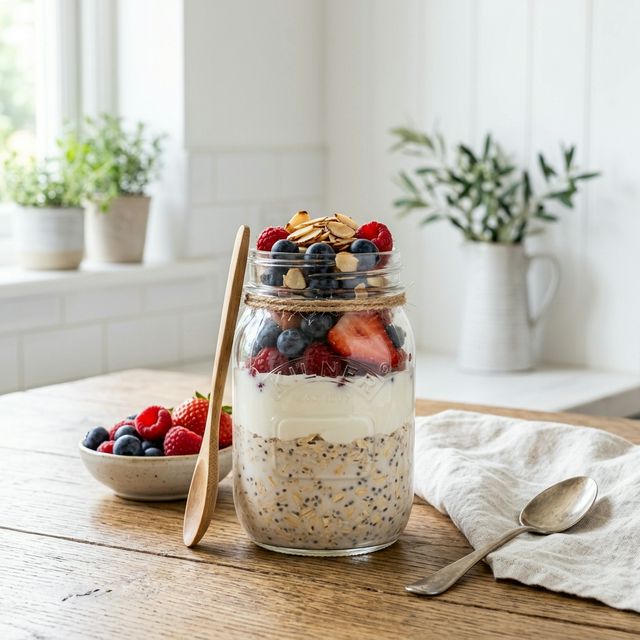
Overnight Oats with Berries
Thick, creamy overnight oats made with Greek yogurt, chia seeds, and mixed berries. 5 minutes of prep, 4 jars ready for the week.